Anatomy of a web page
Last updated on 2026-02-26 | Edit this page
Overview
Questions
- What’s behind a website, and how can I extract information from it?
- How can I find the code for a specific element on a web page?
Objectives
After completing this episode, participants should be able to…
- Identify the structure and key components of an HTML document
- Explain how to use the browser developer tools to view the underlying HTML content of a web page
- Use the browser developer tool to find the HTML code for specific items on a web page
Introduction
Before we delve into web scraping properly, we will first spend some time introducing some of the techniques that are required to indicate exactly what should be extracted from the web pages we aim to scrape.
Here, we’ll develop an understanding of how content and data are structured on the web. We’ll start by exploring what HTML (Hypertext Markup Language) is and how it uses tags to organise and format content. Then, we’ll look at how to view the HTML source code for a web page and look at how browser developer tools can be used to search for specific elements on a webpage.
HTML quick overview
All websites have a Hypertext Markup Language (HTML) document behind them. Below is an example of HTML for a very simple webpage that contains just three sentences. As you look through it, try to imagine how the website would appear in a browser.
HTML
<!DOCTYPE html>
<html>
<head>
<title>Sample web page</title>
</head>
<body>
<h1>h1 Header #1</h1>
<p>This is a paragraph tag</p>
<h2>h2 Sub-header</h2>
<p>A new paragraph, now in the <b>sub-header</b></p>
<h1>h1 Header #2</h1>
<p>
This other paragraph has two hyperlinks,
one to <a href="https://carpentries.org/">The Carpentries homepage</a>,
and another to the
<a href="https://carpentries.org/workshops/past-workshops/">past workshops</a> page.
</p>
</body>
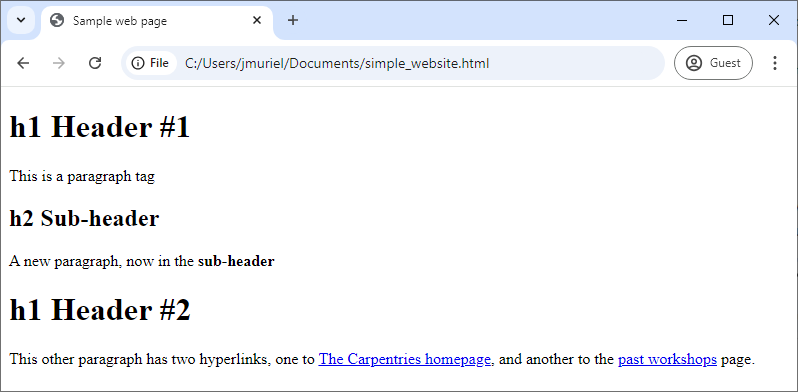
</html>This text has been saved with a .html extension, SampleWebpageCode.html. If you
open it in your web browser, the browser will interpret the markup
language and display a nicely formatted web page as below.
When you open an HTML file in your browser, what it’s really doing is
reading a structured document made up of elements, each
marked by tags inside angle brackets (<
and >). For instance, the HTML root element, which
delimits the beginning and end of an HTML document, is identified by the
<html> tag.
Most elements have both an opening tag and a closing tag, which
define the start and end of that element. For example, in the simple
website we looked at earlier, the head element begins with
<head> and ends with </head>.
Because elements can be nested inside one another, an HTML document forms a tree structure, where each element is a node that can contain child nodes, as illustrated in the image below.

Finally, we can define or modify the behaviour, appearance, or
functionality of an element using attributes.
Attributes appear inside the opening tag and consist of a name and a
value, formatted like name="value".
For example, in the simple website, we added a hyperlink using the
<a>...</a> tags. To specify the destination
URL, we used the href attribute inside the opening
<a> tag like this:
<a href="https://carpentries.org/workshops/past-workshops/">past workshops</a>.
Here is a non-exhaustive list of common HTML elements and their purposes:
-
<html>...</html>: The root element that contains the entire document. -
<head>...</head>: Contains metadata such as the page title that the browser displays. -
<body>...</body>: Contains the content that will be shown on the webpage. -
<h1>...</h1>, <h2>...</h2>, <h3>...</h3>: Define headers of levels 1, 2, 3, and so on. -
<p>...</p>: Represents a paragraph. -
<a href="">...</a>: Creates a hyperlink; the destination URL is set with the href attribute. -
<img src="" alt="">: Embeds an image, with the image source specified bysrcand alternative text provided byalt. It doesn’t have an opening tag. -
<table>...</table>, <th>...</th>, <tr>...</tr>, <td>...</td>: Define a table structure, with headers (<th>), rows (<tr>), and cells (<td>). -
<div>...</div>: Groups sections of HTML content together. -
<script>...</script>: Embeds or links to JavaScript code.
In the list above, we mentioned some attributes specific to hyperlink
(<a>) and image (<img>) elements,
but there are also several global attributes that most HTML elements can
have. These are especially useful for identifying elements when web
scraping:
-
id="": Assigns a unique identifier to an element; this ID must be unique within the entire HTML document. -
title="": Provides extra information about the element, shown as a tooltip when the user hovers over it. -
class="": Applies a common styling or grouping to multiple elements at once.
This A to Z List gives a comprehensive list of HTML tags.
CSS (Cascading Style Sheets) is code which allows the way that a web page is displayed (colours, fonts etc) to be separated from the content. It allows the same styles to be applied to a set of HTML documents without the need to specify them in each document.
CSS uses rule sets which are applied to the HTML elements using selectors.
You may see selectors applied to HTML elements by tag, class or ID.
These may be useful for targeting elements when web scraping. The CSS
rules may be applied using a tag in the HTML file or
may be in a separate .css file linked from the HTML
file.
An example of two style rules applied to our HTML example are shown below. They can be viewed by opening the WebpageCSS.html file.
HTML
<!DOCTYPE html>
<html>
<head>
  <title>Sample web page</title>
  <style>
        /* CSS Rule */
        h1 {
            color: blue;
            /* Property: value */
            font-size: 24px;
        }

        p {
            color: green;
            font-size: 16px;
        }
    </style>
</head>
<body>
  <h1>h1 Header #1</h1>
  <p>This is a paragraph tag</p>
  <h2>h2 Sub-header</h2>
  <p>A new paragraph, now in the <b>sub-header</b></p>
    <h1>h1 Header #2</h1>
    <p>
    This other paragraph has two hyperlinks,
    one to <a href="https://carpentries.org/">The Carpentries homepage</a>,
    and another to the
    <a href="https://carpentries.org/workshops/past-workshops/">past workshops</a> page.
  </p>
</body>
</html>
For more information this CSS Introduction and CSS Cheat Sheet provide a good starting point.
To summarize: elements are identified by tags, and attributes let us assign properties or identifiers to those elements. Understanding this structure will make it much easier to extract specific data from a website.
Inspecting the web page source code
We will use the HTML code that describes this very page you are reading as an example. By default, a web browser interprets the HTML code to determine what markup to apply to the various elements of a document, and the code is invisible. To make the underlying code visible, all browsers have a function to display the raw HTML content of a web page.
Exercise: Display the source of this page
Using your favourite browser, display the HTML source code of this page.
Tip: in most browsers, all you have to do is do a right-click anywhere on the page and select the “View Page Source” option (“Show Page Source” in Safari).
Another tab should open with the raw HTML that makes this page. See if you can locate its various elements, where the head and body elements start and end. See if you can pickout this challenge box in particular.
You will see that this webpage is quite complex and it may not be easy to pick out the elements that you are looking for. Many webpages are automatically generated and may not be laid out in the straightforward manner of our initial, very simple, example.
Try searching for head> or body> to locate both the start and end of these sections.
Even though these may be difficult to locate, you will see that the same overall structure is still used for the webpage.
The HTML structure of the page you are currently reading looks something like this (most text and elements have been removed for clarity):
HTML
<!doctype html>
<html lang="en" data-bs-theme="auto">
  <head>
    (...)
    <title>Introduction to Web Scraping: Anatomy of a web page</title>
    (...)
  </head>
  <body>
	 (...)
  </body>
</html>
We can see from the source code that the title of this page is in a
title element that is itself inside the head
element, which is itself inside an html element that
contains the entire content of the page.
Say we wanted to tell a web scraper to look for the title of this
page, we would use this information to indicate the path the
scraper would need to follow as it navigates through the HTML content of
the page to reach the title element. We can search for
specific items in the source page code using the built-in developer
console.
Display the console in your browser
- In Firefox, use the More Tools > Web Developer Tools menu item.
- In Chrome, use the More tools > Developer tools menu item.
- In Safari, use the Develop > Show Error Console menu item. If your Safari browser doesn’t have a Develop menu, you must first enable this option in the Preferences, see above.
Here is how the console looks in the Chrome browser:
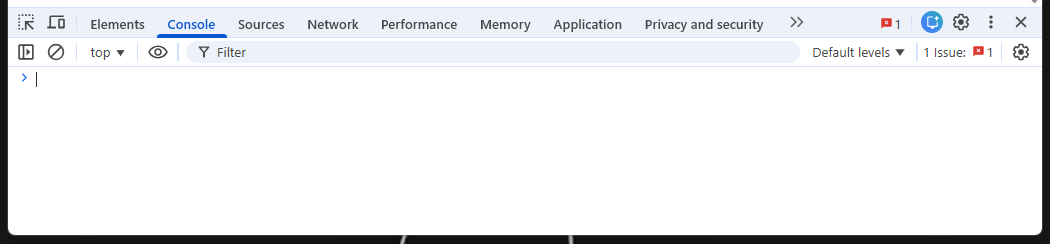
By default the console will probably open in the Console tab. For now, don’t worry too much about error messages if you see any in the console when you open it. We will be using the Elements tab to locate specific items in the web page.
Locate code for specific elements
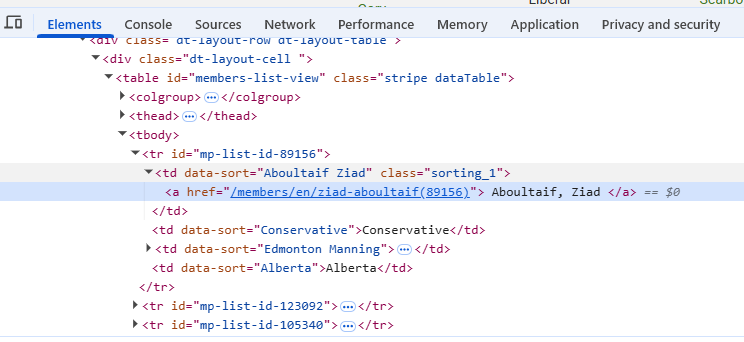
To find the code for a specific item on a web page, hover over it and right click, selecting Inspect from the dialog displayed (shown below).

This will automatically move to the Elements tab in the developer console (opening the developer console if not already open) and display the section of code for the selected element. The specific line of code for the element will be highlighted. In the example below a name was selected on the Canadian MPs webpage resulting in the code below:
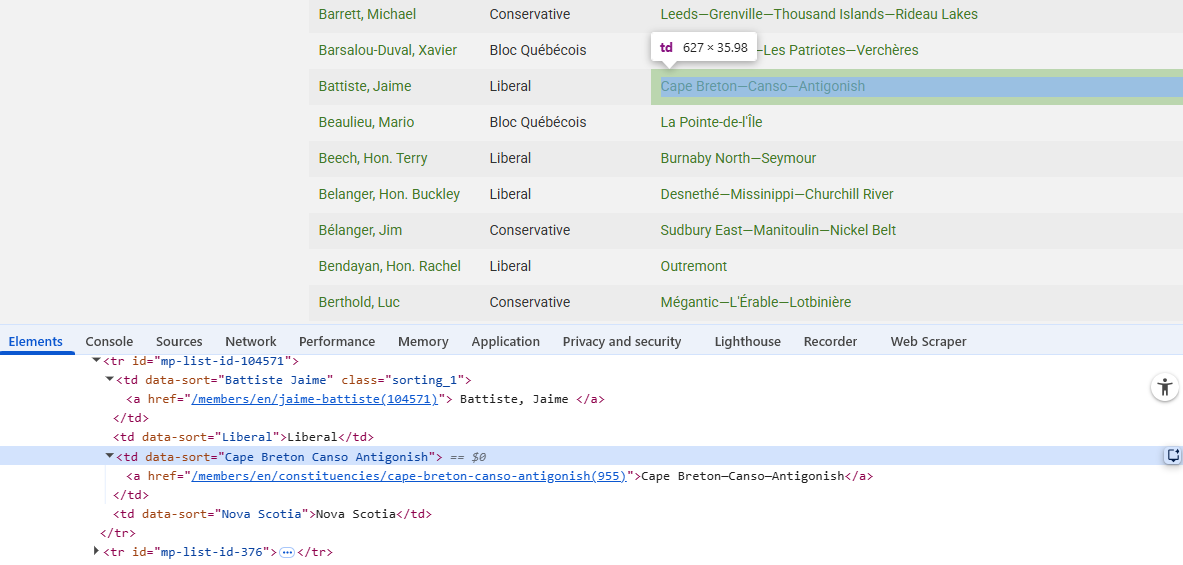
Conversely, by hovering over a line of code in the Elements tab, the corresponding element will be highlighted on the web page, showing the tag and size of the element. This is shown below:
Identify element tag for extracting MP names
Go back to the UK House of Commons webpage. Use the developer console to identify what you might need to search for in order to extract a list of MPs’ names.
Can you see an issue with the data collected if you just searched on this particular page?
The class “primary-info” contains the text for the names.
Note that this information is spread over several pages. It may be necessary to make use of the links for further pages in order to extract all of the required information.
Dynamic websites
We are not going to cover these in detail in this lesson but you should be aware of dynamic websites and how the HTML code observed might differ between these and a static website with no interactive elements.
Visit this practice webpage created by Hartley Brody for learning and practicing web scraping: Oscar Winning Films (but first, read the terms of use). Select “2015” to display that year’s Oscar-winning films.
Now try viewing the HTML behind the page using the View Page Source tool in your browser.
Challenge
Can you find the Best Picture winner Spotlight anywhere in the HTML?
Can you find any of the other movies or the data from the table?
If not, how could you scrape this page?
When you explore a page like this, you’ll notice that the movie data (including the title Spotlight) isn’t present in the initial HTML source. That’s because the website uses JavaScript to load the information dynamically. JavaScript is a programming language that runs in your browser and allows websites to fetch, process, and display content on the fly — often in response to user actions, like clicking a button.
When you select “2015”, your browser runs JavaScript (triggered by
one of the <script> elements in the HTML) to retrieve
the relevant movie information from the web server and dynamically
update the table. This makes the page feel more interactive, but it also
means that the initial HTML you see doesn’t contain the movie data
itself.
You can observe this difference when using the “View page source” and “Inspect” tools in your browser: “View page source” shows the original HTML sent by the server, before any JavaScript runs. “Inspect” shows the rendered HTML, after JavaScript has executed and updated the page content.
- Every website is built on an HTML document that structures its content.
- An HTML document is composed of elements, usually defined by an
opening
<tag>and a closing</tag>. - Elements can have attributes that define their properties, written
as
<tag attribute_name="value">. - CSS may be used to control the appearance of the rendered webpage.
- Dynamic webpages may have content which isn’t loaded until the item is selected.